In this article we are going to relate how to set up virtual machines on Ubuntu with KVM. I think that KVM is the future of the virtualization in the open source world, especially because it is a technology developed by Red Hat and this company is betting very hard for it.
First of all, we have to make sure whether our hardware supports virtualization (I am going to carry out the testing on Kubuntu 10.10 64 bits). For this purpose, we must check out if the vmx or svm flags appear into the cupinfo file.
javi@javi-kubuntu:~$ cat /proc/cpuinfo | egrep "(vmx | svm)" | wc -l
2
In my case, the result is two (my processor has got two cores). Then, we have to install the necessary packages:
javi@javi-kubuntu:~$ sudo aptitude install kvm libvirt-bin virt-managerNow, we can see a new virtual network interface (virbr0) and a new group (libvirtd) in the system. My user name has also been added to the libvirtd group.
javi@javi-kubuntu:~$ ip a
...
19: virbr0: <BROADCAST,MULTICAST,UP,LOWER_UP> mtu 1500 qdisc noqueue state UNKNOWN
link/ether 0e:af:bc:3a:c8:6a brd ff:ff:ff:ff:ff:ff
inet 192.168.122.1/24 brd 192.168.122.255 scope global virbr0
inet6 fe80::caf:bcff:fe3a:c86a/64 scope link
valid_lft forever preferred_lft forever

javi@javi-kubuntu:~$ cat /etc/group
...
libvirtd:x:124:javi
We have to restart the sesson for the user changes take effect. In order to verify that everything is right, we can type the following command:
javi@javi-kubuntu:~$ virsh -c qemu:///system list
Id Nombre               Estado
-------------------------------
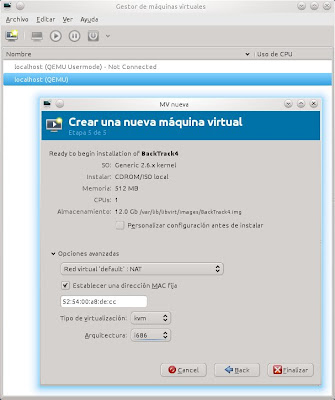
Now we can create our first virtual machine opening the Virtual Machine Manager (Applications, System, Virtual Machine Manager), picking out localhost (QEMU) - Not Connected option and making double click on it (this is the hypervisor to which we connect - qemu:///system). Then we must press on Create a new virtual machine button and complete the different steps of the wizard.
Through the wizard, we will have to choose the features or resources for the virtual machine, such as the name, installation source (ISO, CD-ROM, network, PXE, importing the image, etc.), type and version of the operating system, amount of memory and CPUs, size of the virtual hard disk, etc.
In the last step, we can see a little summary about the selected characteristics and besides, pick out the type of virtualization (kvm, qemu - we will choose kvm), the sort of architecture (x86_64 or i686 - depends on the operating system to be installed) and the kind of network (NAT by default). In future articles, I will explain how to configure different types of virtual networks.

During the virtual store step, we can select a tab about allocating all the disk size now... In my personal opinion, we must mark this option because the virtual machine performance will be better if all the disk space is reserved from the beginning.
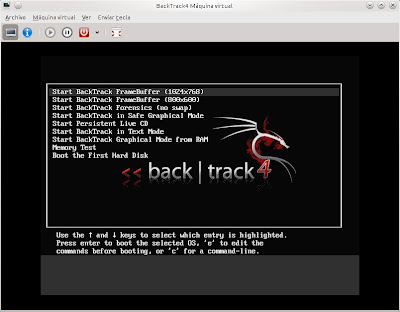
At the end of this process, we will have a screen with the new virtual machine embedded within it and we will be able to performe several operations on it: run, pause, shut down, clone, migrate, etc.


No comments:
Post a Comment